This is WIP and may contain wrong information
For general tips and info regarding WeaponCore, take a look at the WC wiki.
For hard numbers on everything, check out Drew’s Spreadsheets.
¶ Abbreviations
SDX - Sigma Draconis Expanse, the Expanse themed cluster by Sigma Draconis Games
WC - WeaponCore, the framework utilized by all weapons on SDX
ROF - Rate of fire, the amount of shots fired per time
CQB - Close quarters battle, also ‘PDC brawling’, get within 3 km of the enemy and shoot them with your PDCs
PDC - short range defense turrets against guided weapons
SG - Small Grid
LG - Large Grid
CC - Cargo Container, also LCC and SCC for large/small CCs
UI - User Interface
¶ The Basics
To get it out of the way from the beginning:
There are no SG weapons on SDX, except for detection blocks (Lidar/Fireworks Launcher).
We do not have access to the vanilla weapons, custom turrets (the rotor+hinge ones) are a bad idea and most PMW designs will get evaporated by PDCs before reaching their target.
Combat on SDX revolves around three four categories of weapons:
- Rail- and Coilguns can punch through entire ships from 10 km out and can barely be evaded
- Torpedoes take out chunks of grids from 16 km out but can be countered
- PDCs, MM-30 Coilgun Turrets and Anti-Torp-Torpedoes protect ships from Torpedo attacks
- Kess boats serve as cheap glass cannons with a range of 8 km
 |
|---|
| Note: PDCs are 3km max range and Rail- and Coilguns are all 10 km max range nowadays. |
¶ Voltaire Lidar System
The Lidar is a passive WC block that detects all grids and suits within 24 km.
Contrary to its real life counterpart, our Lidar does not require line-of-sight (LOS). You can’t hide behind an asteroid or inside a grid. Lidar does not show seated suits.
The SG variant of the Lidar has a range of 16 km and requires 1 rare Reactive Motor component. The SG Fireworks Launcher works as a cheap replacement with a range of just 8 km.
¶ Weapon Exclusion Zones
Weapons on the server have exclusion zones which prevent placement of other weapon blocks within a certain range. This is to prevent the spamming of different weapons, incentivizing more creative ship designs. To show the exclusion zones, take any WC Weapon or Lidar Block into your hand and set your UI to show all elements (Tab to cycle).
¶ Desync Mitigation
WC fixed weapons tend to have issues when combined with nexus servers, specifically on instance transfer. Turreted weapons are susceptible too. If you plan to participate in combat after a server transfer, make sure to:
- !fixship
- relog (F5)
- (optional) consider the Multiplayer Prediction Switcher plugin
- (optional) have at least one rotor on the grid with a head attached
The rotor and the plugin change how the game calculates your grids physics, this will eliminate most movement/position based desync between the server and client. Don’t put too many more blocks on the rotor, subgrids are susceptible to drag above cruise speed.
For best results when using fixed weapons, set a hotbar slot to Cycle Trigger Mode, and set a nearby hotbar slot to Shoot, which will be used to fire the weapon(s).
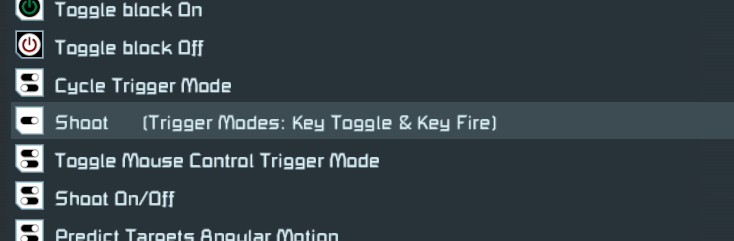 |
|---|
Make sure to regulate when you have keyfire enabled, so you aren’t accidentally discharging the weapon. It’s recommended to avoid mousefire if you’re using the Seamless Nexus Plugin, as it may not work if you transfer server and don't use F5 to relog.
¶ Subsystem list
Make sure you have selected a category AND turned "Target Subsystems" on!
- Jumping: Jump Drives (useless, we don't have jump drives)
- Offense: Turrets, fixed weapons, warheads
- Power: Any power producer (SE also calls storage, like a battery, a power producer)
- Production: Production blocks (assembler, refinery, H2O2 Gen, survival kit, etc) and vanilla upgrade modules
- Steering: Gyros and cockpits that you can control a ship from (this would exclude generic seats)
- Thrust: Thrusters, obviously.Weapon-based thrusters like afterburners will not be included in this category
- Utility: Custom upgrade modules, Antennas, Remote Controls, Ship Tools, Medical Rooms, or Cameras.
¶ Point Defense Cannons
Point defense is the defense of a single object or a limited area against torpedoes and guided missiles.
Armor can be important for defense against PDCs in close range. Exposed functional blocks will rapidly be destroyed in CQB. Light armor barely delays damage, though it does make a difference. Heavy armor may be used but is not optimal either. Your best bet is Carbon-Silicate Armor, but this end game material is hard to get.
All PDCs have a maximum range of 3 km.
PDC ammo is explosive.
¶ Overheating mechanic
PDCs build up heat when firing, and dissipate heat when not firing. Once around 80% heat is reached, the PDC fires with a reduced RoF. If it continues firing, it overheats, stops firing and slowly cools down again. There are different techniques to manage this heat, like PDC banking and staggered ranges, but I won’t cover them here.
Be aware that desync between the server and your client may result in wrong heat values displayed by WC. Scripts that monitor PDC heat can mitigate this issue.
¶ Random vs closest
Once upon a time, all PDCs were picking random targets off of their target list. And it was good. Well, it wasn't/isn't truly random either, but that's out of scope for this here page.
Nowadays we get to choose: Besides the '(Random)' variant, Inner and OPA PDCs have a '(Closest)' variant. These are supposed to help with torpedoes slipping through the random PDC net in high performance applications. Do not run a full closest PDC setup. If you feel the need to include them, I'd suggest having around 10% to 20% of your PDC net be the closest variant.
¶ Lead-Steel Ammo (LS)
Almost all belter PDCs use the same 40mm Lead-Steel PDC Boxes, which have a base damage of 1000 and a projectile velocity of 2,500 m/s. PDCs do 50% damage to armor blocks.
¶ Tungsten-Teflon Ammo (TT)
Advanced PDCs use 40mm Tungsten-Teflon ammo, which is slightly better than its belter counterpart, traveling at 3,000 m/s and doing 1200 base damage per shot, but maintaining the 50% damage to armor.
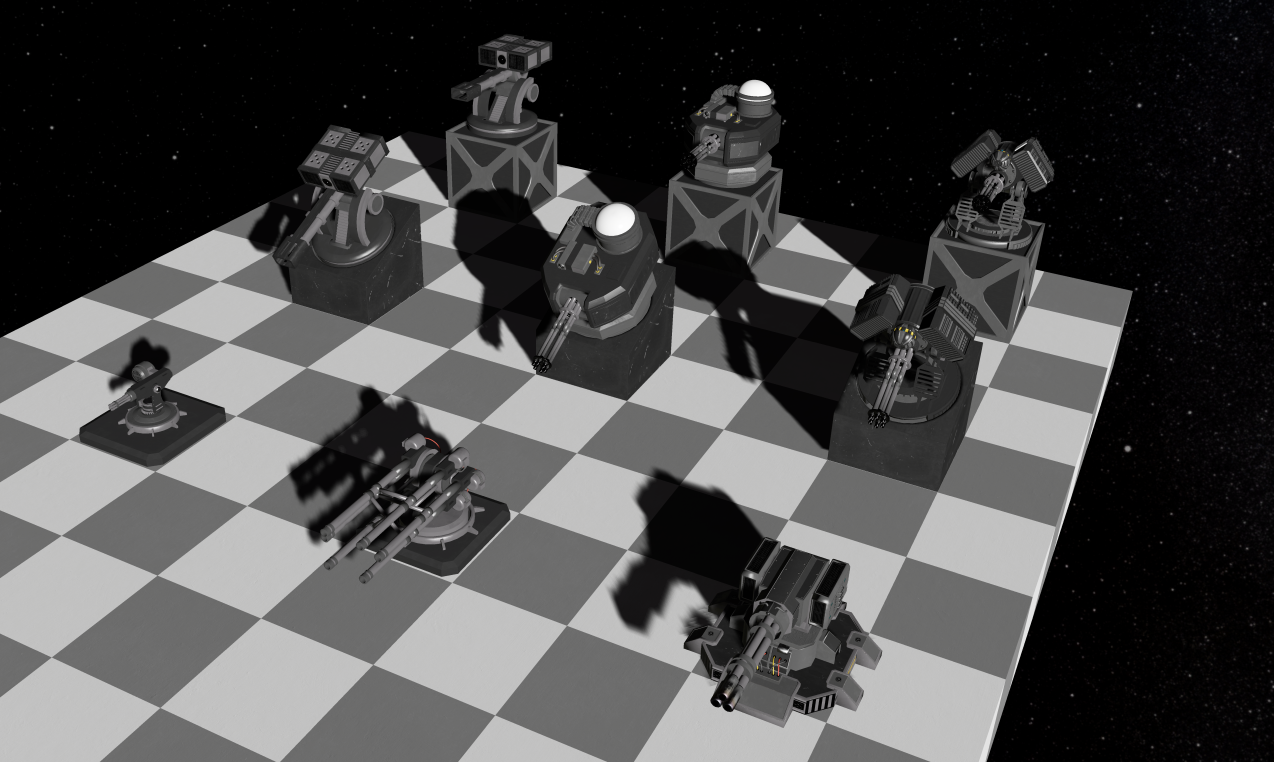 |
 |
|---|---|
| PDCs | Lidar, Kess, Glapion |
Ammo: LS
Voltaires are the basic model PDC on expanse, they are very cheap to build, quick to overheat, and with a terrible RoF. You would need to use a lot of them to ensure torpedoes are shot down in any combat environment. Due to their decent accuracy, Voltaires are a good choice for TTU hunting (PDC brawl method) and against suits. (Target closest only)
Ammo: LS
The real entry-level PDC. Bad accuracy, but it’s better than the Voltaire at shooting down torpedos due to a higher rate of fire and lower heat generation. (Target random only)
Ammo: LS or TT
OPA PDCs will give you far and above the best performance of the Belter level PDC options. They’re more accurate than Flaks and Voltaires, build up heat very slowly and they have the ability to use 40mm Tungsten-Teflon ammo which gives them greater damage.
Ammo: TT
The OPA Shotgun fires 40mm Tungsten-Teflon ammo that shatters in the barrel, creating shrapnels. It has a bad ROF, slow projectiles and overheats quickly, but the shrapnels can take out groups of torpedoes at close range.
Ammo: TT
Narimans currently have the most accurate cone of fire, while Redfields will have a better fire rate performance at high heat levels. Take a look at Drew’s Spreadsheets for all the details separating the two.
Light armor will be rapidly chewed through and heavy armor won't last for long either if no evasive maneuvers are taken, as the Inner PDCs have much higher ROF than their belter counterparts.
¶ Fixed Lowtech Weapons
These are intended as entry level weapons, they require little to no tech and the ammo recipes are reasonably cheap.
Kess and Glapion ammo is explosive.
¶ Target Lead Indicator
To get a target lead indicator, set a fixed weapons ‘Target Lead Group’ in the control menu.
It’s fine to group weapons of the same type, but use different group numbers for different weapon types.
- Ammo: 180mm Lead-Steel Slug (Sabot / HE / Canister)
It is a fixed weapon which uses 180 mm ammo, the range is 8 km, it’s a cheap way of attacking ships from beyond PDC range, but low muzzle velocity of 2 km/s and relatively high inaccuracy make it difficult to use effectively. The two Ammo types actually worth using are Sabot (minimize collateral damage) and HE (maximise area damage).
Still a great weapon for pirates (TTU are innocent haulers btw, one or two cannons is usually enough) and for an expendable PvP ship (use ten or more). The Kess Hashari Cannon is hard to use effectively in a PvP environment, but if you manage to get hits in, this thing still *hurts*, although not as much as in the olden days. Often nerfed, somehow still relevant as it is dirt cheap.
- Ammo: 40mm Tungsten-Teflon PDC Box (TWO)
Uses the same ammo as Inner PDCs, but it has a longer barrel and thus a longer effective range, 6 km and a muzzle velocity of 2 km/s. DPS is slightly better than a Flak PDC.
The Glapion utilizes the same overheat mechanic as PDCs. The Kess Hashari cannon does, too, but it is impossible to overheat due to its low ROF.
¶ Railguns
¶ and the Coilguns, too
All Rail- and Coilguns have a maximum range of 10 km. From here onwards, I'll say railguns, but more than likely mean rail- and coilguns.
The usual progression for PvE is
PDCs/Kess/Fixed Rail > Zako Turret > Stiletto
Hunting ships commonly employ 1-4 Railguns (most run two) of the same kind.
¶ Charging
All railguns have a variable charge mechanic, charging up depending on the amount of available power, maxing out at a specified charge time depending on railgun. Charge time decreases exponentially, you’ll get smaller steps per MW the closer you get to the maximum. A mix of reactors and Tycho Batteries is used to power them. Forget about vanilla Batteries.
Check this HANDY CALCULATOR (link coming soon)
Multiple Railguns will charge one after the other if power requirements are not met.
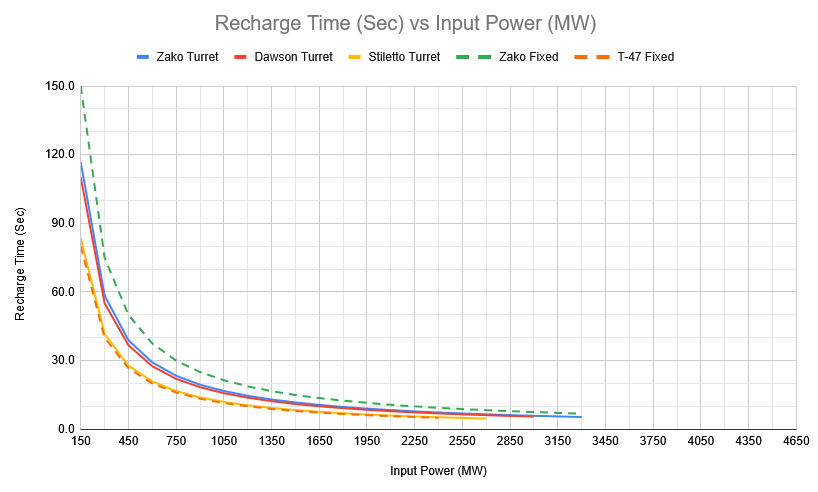 |
|---|
| For one Fixed Zako, 2500MW is the maximum amount of power which has to be provided to the railgun for 9 seconds to reach it’s fastest recharge. |
¶ Gimbaled Slugs
Fixed Railguns shoot gimbaled projectiles that correct their flight path towards your target by up to 5° off bore right after being shot. It's basically built-in auto-aim.
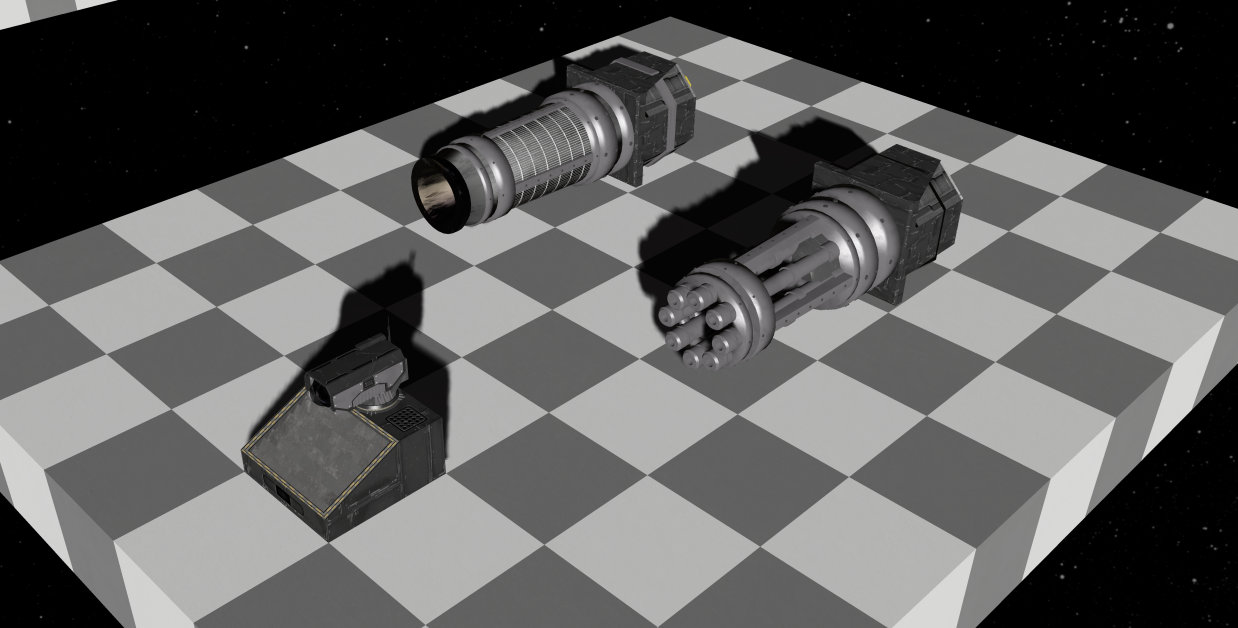
 |
 |
|---|---|
| Fixed Zako and T-47 | MM-30, Zako, Stiletto and Dawson |
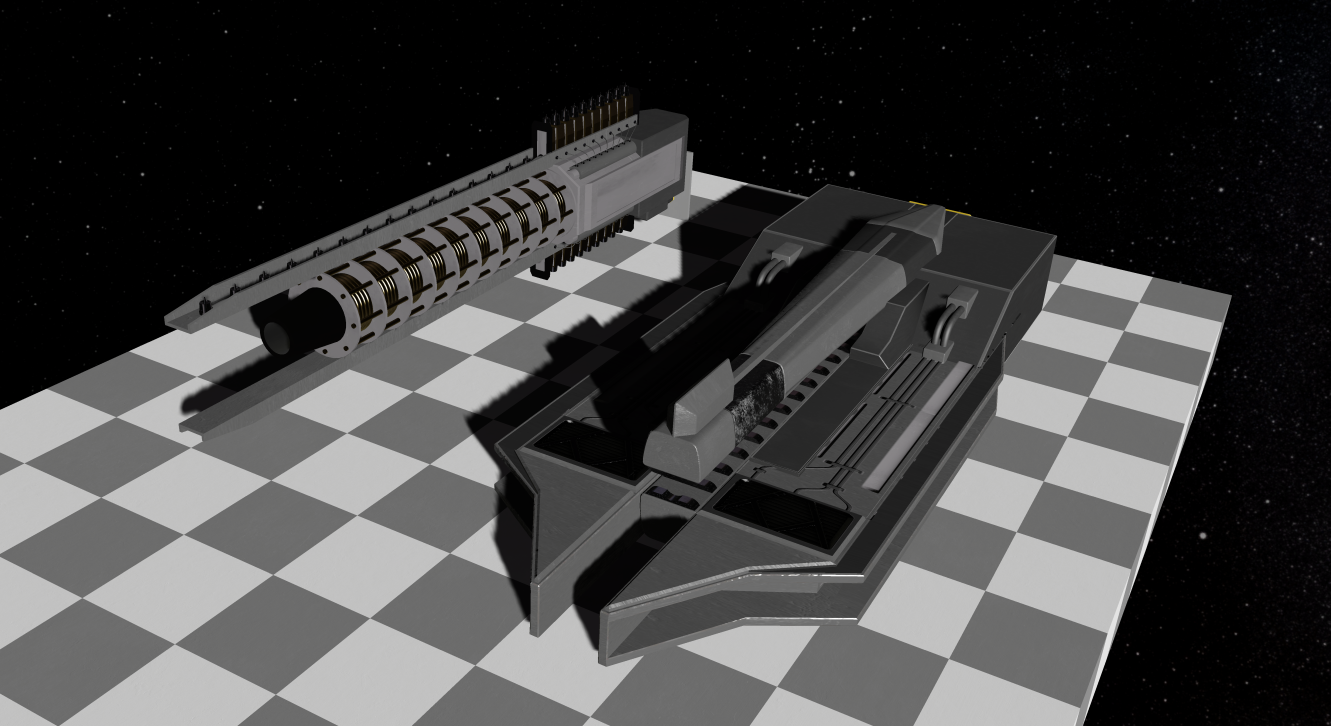
¶ Fixed Rail- and Coilguns
- Min. charge time: 7 seconds
- Max. Power Draw: 2500 MW
- Ammo: 120mm Lead-Steel Slug
The first coilgun the player will generally have access to will be the fixed Zako coilgun. It uses 120mm Lead-Steel Slugs, the ammo is relatively cheap to manufacture compared to railguns.
Built with 50 Belter Components.
- Min. charge time: 4 seconds
- Max. Power Draw: 2250 MW
- Ammo: 80mm Tungsten-Uranium Sabots
In addition to gimbaled slugs, the T-47 can shoot fully guided RLGS slugs. The correction angle is smaller than with gimbaled slugs, but its more precise.
Built with 50 Upgraded Belter Components.
- Min. charge time: 7 seconds
- Max. Power Draw: 2500
- Ammo: Any 100mm Tungsten-Uranium Sabot
A modern, high damage, fixed Railgun design from the UNN.
Built with 200 Inner Components.
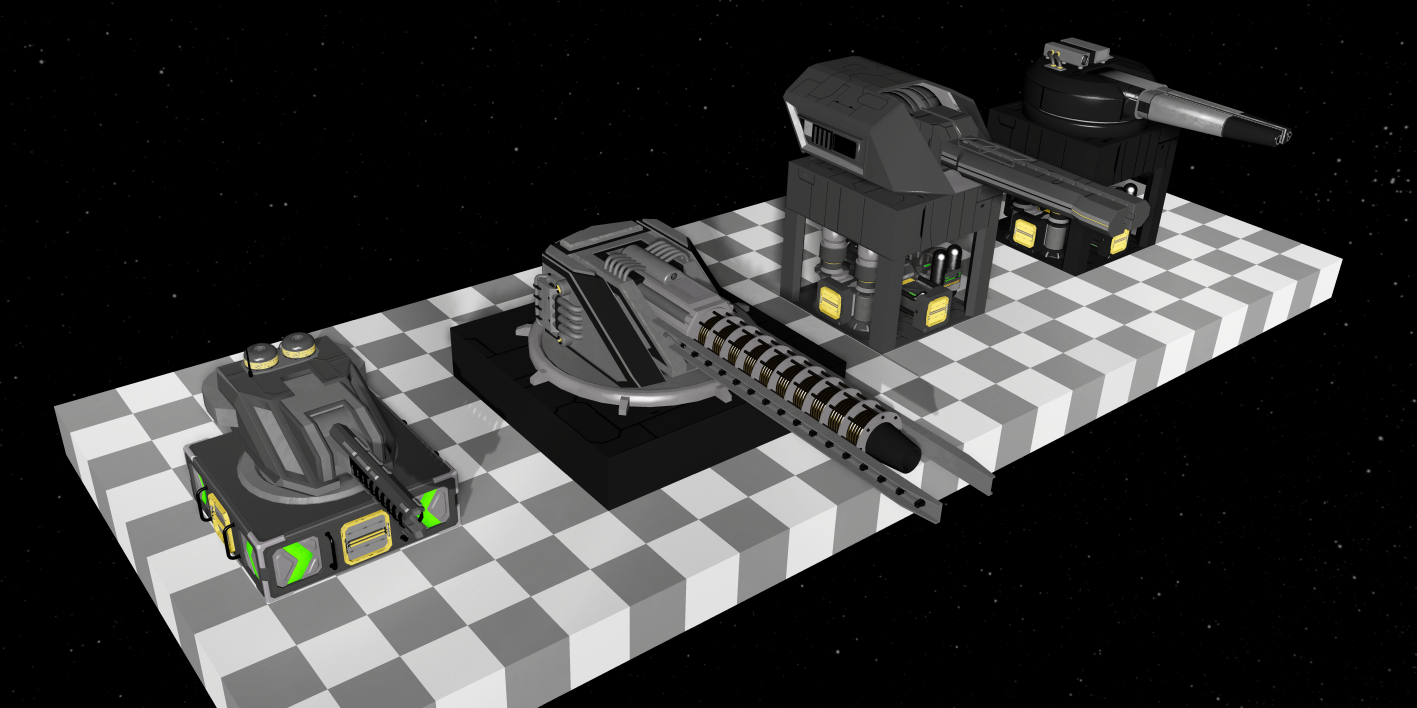
¶ Coilgun Turrets
The Coilguns need 25 and 50 Upgraded Belter Components to build, respectively.
- Min. charge time: 6 seconds
- Max. Power Draw: 900 MW
- Ammo: 80mm Tungsten-Uranium Sabots (Sabot, Flak)
Multi-purpose turret that can be used offensively and defensively. Shoots in bursts of up to 3, either armor penetrating Sabots or Flak rounds that explode into a rain of shrapnel (great against torpedos). The MM-30 won’t penetrate as deep as other rail- or coilguns.
Pretty bad accuracy, low damage and expensive ammunition, do not use this for hunting. Get a Zako turret instead!
- Min. charge time: 6 seconds
- Max. Power Draw: 2500 MW
- Ammo: 120mm Lead-Steel Slug
A Zako on a turret mount, the bread-and-butter slug accelerator for the established mid-game player. You have it, the TIH pirate stations have it, all the ‘nation hunters’ come with two of these babies.
Bad accuracy, nice damage. Get up close (4-6 km) to actually hit what you’re aiming at.
¶ Railgun Turrets
The railguns each need 50 special Advanced (MCRN/UNN/OPA) Components to be built.
- Min. charge time: 5 seconds
- Max. Power Draw: 2500 MW
- Ammo: 100mm Tungsten-Uranium Sabot MCRN
Hunter’s favourite, with the precision of a scalpel and the power consumption of a small city.
Found on the Pella in the T1-T0 FNVY hunting grounds.
- Min. charge time: 5 seconds
- Max. Power Draw: 2800 MW
- Ammo: 100mm Tungsten-Uranium Sabot OPA
The OPA wanted a railgun to compete with the Inners', and they succeeded: The Ashford borrows from both the UNN and MRCN railgun and sits comfortably between the two on almost all stats.
Found on the Zmeya in the T1-T0 FNVY hunting grounds.
- Min. charge time: 5 seconds
- Max. Power Draw: 3333 MW
- Ammo: 100mm Tungsten-Uranium Sabot UNN
PvPers favourite, less precise than the Stiletto, but better elevation, turn speed and damage.
Found on the Granicus in the T1-T0 FNVY hunting grounds.
- soon™
(these use the 120mm Tungsten Uranium Sabot UNN/MCRN/OPA)
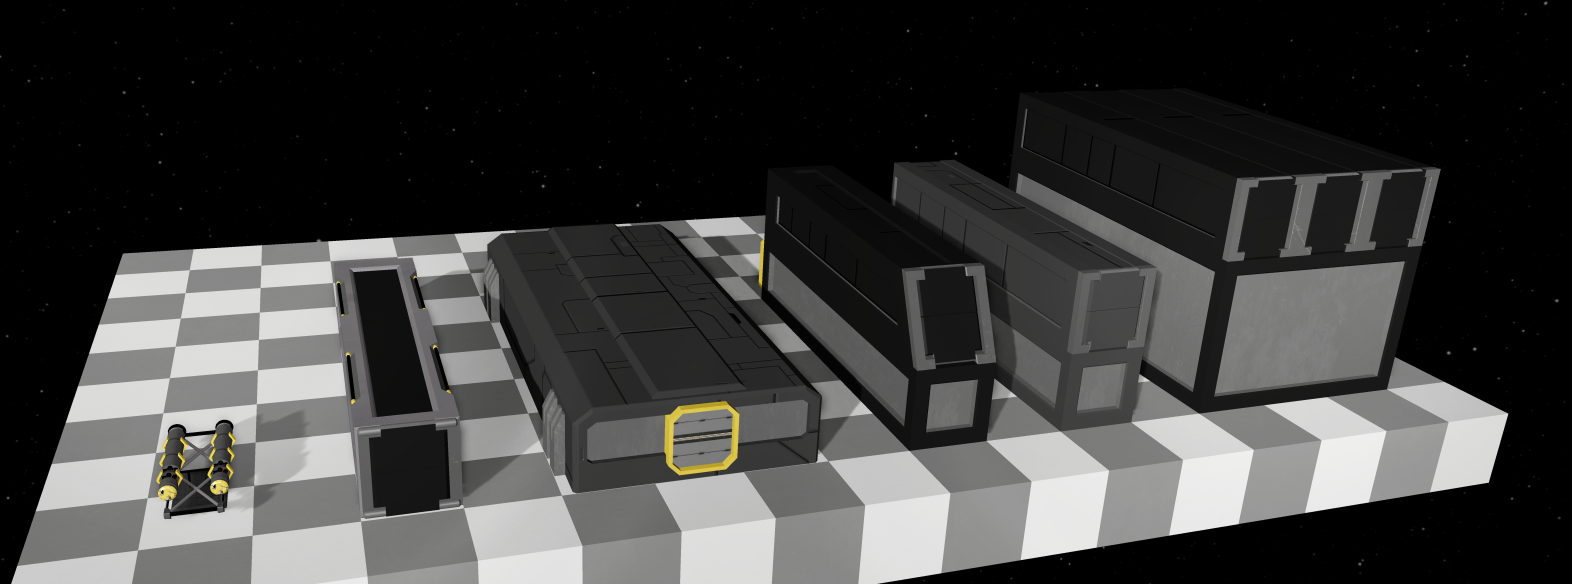
¶ Torpedo Launchers
All torpedoes have a lock-on range of 16 km and a maximum travel range of 24 km.
Torpedo Launchers have a high constant power consumption, turn them off when not in use.
Torpedoes are explosive.
Torpedo Launchers are subject to block limits:
- 4 Artemis Launchers per grid
- 8 Launchers per type of the others
- 16 Torpedo Launchers combined per grid
When a torpedo hits your ship, it’ll do damage to any blocks within its damage radius. Suffice to say, you do not want to be hit with a torpedo. For this reason, warships commonly employ between 20 to 50 PDC turrets as well as Coilguns and Anti-Torp-Torpedoes (ATT).
To reiterate, the torpedoes do NOT have a damage pool, everything within their radius takes damage regardless of the maximum integrity of blocks within said radius, with damage amount being decided solely by radius from epicenter. The best armor against torpedoes is highly spaced low density blocks, with important blocks as far from the outer edges of your ship and/or each other as possible to shoot them down before they hit you.
Tip: Use the BI overlays (Ctrl + + or Ctrl + ]) to determine what’s ‘forward’ on the block.
 |
 |
|---|---|
| Torpedo Launchers | Torpedo Ammunitions |
- Ammo: (small) Ramshackle Torpedoes
The Tycho torpedo launcher can only fire small ramshackle torpedoes, which exit the block from the front, the block only has capacity for 2 torpedoes to be loaded at a time, and can only be hand loaded, but the launcher and ammo are cheap.
- Ammo: Large Ramshackle Torpedoes, 220mm Explosive Torpedoes
The Apollo launcher can fire either large ramshackles or 220mm Explosive torpedoes. They exit from the top of the block, facing forward. The Apollo has conveyor connections on the front and rear face, and can fire 4 torpedoes every 15 seconds, which puts it a similar category as the Ares launcher, but at a lower tech level, requiring upgraded belter components to be built instead of inner components.
- Ammo: 220mm Explosive, 220mm MCRN and 220mm UNN Torpedoes
The Artemis torpedo launcher is a single fire conveyor reloaded inner torpedo launcher. The Artemis launcher takes 15 seconds to reload a torpedo.
- Ammo: 220mm Explosive, 220mm MCRN and 220mm UNN Torpedoes
The Ares torpedo launchers come in 2 forms, a sloped and flat version, which are exactly the same except for looks. The torpedoes come out the front of the launcher, and can be fired in bursts up to 3 torpedoes before a reload of 13 seconds.
- Ammo: 220mm Explosive, 220mm MCRN and 220mm UNN Torpedoes
The Zeus launcher fires from the top of the forward face, with a rather large volley of 9 torpedoes, it reloads in 15 seconds, and takes 19 seconds to fire the full 9 torpedo volley. Capable of firing 220mm Explosive, 220mm MCRN, and 220mm UNN torpedoes, the Zeus excels at pressuring PDC networks, overheating them quickly, but the downside is size and the streaming vs the cloud of torps.
¶ Torpedo Ammo types
Firing torpedoes in sequence or all at once has a significant impact on the ability of torpedoes to get through PDC fire. You can either attempt to overwhelm a grids PDC net with a front loaded alpha strike, or slowly stream torpedoes in (1 at a time with a delay) to cause maximum overheat with minimum torp use, then send a strike when the enemies PDCs are overheated and with a reduced ROF. Torpedo type and spread settings will also affect this greatly, slower torpedoes like the small and large ramshackle take longer for the initial PDC fire to intercept them, but have lower health per torpedo. As always, refer to Drew’s Spreadsheets for actual numbers on everything.
Torpedo Launchers need LOS from about 1.5 blocks in front of the actual tube to their target, keep that in mind when designing a ship.
For ATT, set the Launcher to ‘Target Mode: AI’, ‘Control Mode: AI’, ‘Focus Fire: Off’, ‘Grids: Off’, ‘Projectiles: On’ to have it automatically fire on incoming torps. ‘Supportive Point Defense’ works too, but may drain your supply quickly.
Both Ramshackle Torpedoes and Large Ramshackle Torpedoes do not have alternative ammo types, they just hit a target and explode.
- Explosive - normal mode of operations, hit a target and explode
- Decoy - tries to circle around the enemy grid to overheat PDCs
- Anti-Torp Explosive - Explodes into shrapnels to shoot down enemy torpedoes
HEKP (Artemis Launcher only) - Kinetic penetrator "chaser torp" with low damage, evades PDC fire(disabled, to be reworked)
MCRN Torpedoes are faster and more agile, with a smaller AoE, less HP and damage than their UNN counterpart. The numbers are close though.
- Low Spread - Torps stay close together on approach and explode on hit
- High Spread - Torps form a wide circle on approach, converge on the enemy when close and explode on hit
- Anti-Torp - Explodes into shrapnels and an EMP cloud that disables enemy torps that run through
With multiple launchers together, the spread pattern can be used to overwhelm a smaller number of PDCs (Low Spread), or force PDCs to slew excessively towards new targets (High Spread), allowing for varied engagements and adaptable launch platforms.
¶ Ingame weapon settings
¶ General Toggles
Advanced WC Features - Shows additional options, keep On
Share control - useless, as there is no Control Button on SDX
Shoot - shoots once, better to use Trigger Modes below
Test Mode - Weapons that require a target can be forced to shoot without one in Test Mode
Track Angular Motion - Account for rolling movements of the target
¶ Modes of operation
Trigger Mode - When to shoot
On all options except Auto (AI Controlled), your turrets will shoot your own grid if it is obstructing the target, but bullets won’t deal any damage to yourself.
The ominous Key for Key Toggle and Key Fire is a Hotbar Slot you put the weapon’s ‘Key Shoot’ on.
Control Mode - Where to shoot
Painting: Right click (sometimes multiple times) to paint the block under the WC crosshair and have turrets aim for that spot. Works while looking through cameras, too.
Objective Mode - when to stop shooting (applies to Auto and Painter Control Mode)
Use Disabled while targetting subsystem Power for most hunting activities. This minimizes collateral damage when depowering your target.
Movement Mode - Only shoot grids that are moving/static etc.
I’ve never used anything else than ‘Any’. If it’s red, it’s dead.
Pick Ammo - do Force Reload after
- see weapon descriptions above or Drew’s spreadsheet for ammo types
Advanced Weaponry has multiple modes of operation available from the same physical ammunitions. No matter if you want to run Sabots or Flak on your MM-30 Coilgun for example, you’ll craft the same 80mm Tungsten-Uranium rounds and set their behavior when fired here.
Force Reload - Reloads the weapon and moves the previously loaded ammo to the weapons own inventory - will delete the ammo if the weapons inventory is already full
Aiming Range - Keep at maximum for now.
¶ Targeting settings
The targeting options have great tooltips explaining what they do, so I’ll just list the recommended settings for basic PvE hunting with a turreted Railgun or two, a few PDCs and no Torps. Set ‘Objective Mode’ to Disabled.
Ask your faction- or nation-mates for advice on PvP settings.
Target Subsystems: On for Railguns, Off for PDCs (for hunting)
Targeted Subsystem: Power for Railguns
Target Focus Fire: Off (be careful about using it!)
Repel Mode: Off
Target Neutrals: On
Target Unowned: On
Target Grids: On for Railguns, Off for PDCs (for hunting)
Large Grid: On - keep always On, just toggle Target Grids if needed
Small Grid: On - keep always On, just toggle Target Grids if needed
Target Biologicals: On - Not available on Railguns
Target Projectiles: On for PDCs, Not available on Railguns
Supportive Point Defense: whatever - doesn’t really matter for solo hunting
Target Meteors: whatever - useless on SDX, no Meteors
Burst Shot Count: Only available on some weapons
Weapon Sequencing
You can make Weapons shoot “in sequence” (one after the other) by assigning a unique Weapon Sequence id to each weapon you want to include, then set them all to the same Weapon Group id. Optionally, give them a short shot delay (measured in *Ticks*!). This feature breaks sometimes.
Target Lead Group: Set this on Fixed Weapons to get a target lead indicator
Weapon Camera Channel: Can't find a proper use for it. Maybe it's for CTC turrets?
Enable Report Target: however you like it